How to Make a Delicious Strawberry Cake Recipe from Scratch
Nothing beats the taste and freshness of a homemade strawberry cake. Store-bought versions fall short when compared to this classic dessert. The combination of real strawberries, premium ingredients, and proper baking techniques creates a professional-quality cake that stands out with its natural pink color and authentic strawberry taste.
The detailed piece shows you the quickest way to create a fresh strawberry cake. You’ll master everything from making the strawberry reduction to assembling the final layers. The exact measurements, mixing methods, and baking temperatures ensure your success. Beginners can follow these simple instructions to bake a beautiful, delicious cake that rivals any professional bakery’s creation.
Ingredients for the Strawberry Cake
The perfect strawberry cake needs precise measurements of ingredients in three main groups. These components play a significant role to create the ideal texture and flavor.
Dry Ingredients
Here’s what you need to create the base of this delicious strawberry cake:
- All-purpose flour: 2½ cups (320g) – make sure to sift it after measuring
- Baking powder: 2½ teaspoons to help your cake rise beautifully
- Baking soda: ½ teaspoon
- Salt: ¾ teaspoon (skip this if you use salted butter)
- Granulated sugar: 1¾ cups (350g)
Wet Ingredients
The cake’s moisture and structure come from these essential ingredients:
- Unsalted butter: 1 cup (226g), at room temperature
- Vegetable oil: ½ cup (120ml)
- Eggs: 3 large, at room temperature
- Vanilla extract: 1 teaspoon
- Sour cream: ½ cup (120g), at room temperature
- Buttermilk: ½ cup (120ml), at room temperature
For the Strawberry Reduction
This fresh strawberry cake recipe gets its authentic flavor from these key ingredients:
- Fresh or frozen strawberries: 16 ounces (453g)
- Granulated sugar: ½ cup (100g)
- Lemon juice: 2 tablespoons
- Lemon zest: 1 tablespoon
- Salt: 1 pinch
Important Notes:Let your refrigerated ingredients reach room temperature before you start. Choose bright red, firm, and fully ripe fresh strawberries. The reduction works well with frozen strawberries too, since they’re picked at peak ripeness. The butter’s quality substantially affects your cake’s final texture, so pick premium unsalted butter. To measure flour accurately, spoon it into measuring cups and level off instead of scooping directly.
This recipe makes a two-layer cake and serves 10-12 people. Success comes easier when you gather and measure all ingredients before you start baking – a technique called “mise en place.”
Making the Strawberry Reduction
A strawberry reduction process turns regular berries into a concentrated flavor base and creates this cake’s authentic taste. This significant step enhances the natural strawberry flavor while it removes excess moisture that might affect the cake’s texture.
Cooking the Strawberries
Clean strawberries properly before you start cooking them fresh or frozen. A mixture of water and white vinegar will give a good clean to fresh berries. Cut the strawberries into even halves after removing their stems. The original cooking step combines these prepared strawberries with sugar and lemon juice in a medium saucepan over medium heat.
These steps are the foundations of the cooking process:
- Place prepared strawberries, sugar, and lemon juice in the saucepan
- Heat the mixture until it begins to bubble
- Reduce heat to medium-low once simmering begins
- Stir occasionally to prevent sticking and sugar burning
- Cook until strawberries become soft and release their juices
Pureeing and Straining
Soft strawberries need a thorough blend to create a smooth puree. A food processor or blender delivers the best results and transforms the mixture into a silky consistency. The puree’s texture can be refined further by passing it through a fine-mesh sieve to remove seeds and fibrous bits.
Reducing the Puree
The real magic happens during the final reduction stage. Your pureed mixture goes back into the saucepan and cooks further. This process concentrates flavors and thickens the consistency. The puree needs 30-40 minutes to change from bright red to a deeper, richer shade.
You’ll know the reduction is ready once it matches tomato sauce consistency and shrinks to half its original volume. It’s worth mentioning that the mixture thickens more as it cools, so aim for a slightly thinner consistency rather than reducing too much.
Let the reduced mixture cool completely before adding it to your cake batter. Skipping this cooling step isn’t an option since warm reduction can ruin your cake’s texture. Store your finished reduction in an airtight container. It stays fresh up to five days in the refrigerator or longer in the freezer.
Preparing the Cake Batter
Perfect strawberry cake recipes depend on precise batter preparation. This significant step demands careful attention and technique. The baker must achieve ideal texture and consistency through methodical mixing and proper ingredient incorporation.
Creaming Butter and Sugar
A perfect cake batter starts with properly creamed butter and sugar. The butter should reach 67°F (cool room temperature). You’ll know it’s ready when you can make an indent by pressing it while it still feels slightly cool. This temperature will give a perfect environment to create air bubbles during the creaming process. Here’s how to cream butter and sugar:
- Start by beating the butter at medium-high speed for 30 seconds until it softens
- Add your sugar slowly as you continue beating
- Let the mixture combine for 3-5 minutes until it becomes light and fluffy
- Remember to scrape the bowl’s sides and bottom at least once
- The process ends when your mixture turns pale yellow (not white) and looks fluffy
Adding Eggs and Flavoring
Creating a stable emulsion needs your full attention during this phase. All eggs must be at room temperature because cold eggs can make the batter curdle. You should add eggs one at a time and beat for 45 seconds between additions. This step-by-step process will give a perfect emulsion that shapes your cake’s texture and rise.
Key temperature notes:
- Your eggs need to be around 70°F
- Your vanilla extract and other flavorings should match room temperature
- A curdled appearance signals a broken emulsion
- Your cake might turn heavy and dense with a broken emulsion
Incorporating Dry Ingredients
The final mixing stage needs you to alternate between dry ingredients and liquid components. This method prevents overmixing and distributes ingredients evenly. Start and finish with dry ingredients in this pattern: add one-third of dry ingredients, then half the liquid ingredients, followed by another third of dry, the remaining liquid, and the final third of dry.
Mix dry ingredients on low speed until they combine. Overmixing at this stage can lead to a tough, dense cake. Your batter should look smooth with a consistent texture and no visible flour streaks. The previously prepared strawberry reduction must be completely cool before you add it to this stage.
The finished batter should coat the back of a spoon but still pour smoothly. This consistency will give a cake that bakes evenly and rises properly in the oven.
Baking the Cake Layers

The right baking technique turns a properly mixed strawberry cake batter into perfectly layered cake with a tender crumb and uniform rise. This significant phase of baking requires precise temperature control and careful timing.
Preparing the Pans
The right pan preparation will give a smooth release of cake layers and prevent sticking. This fresh strawberry cake recipe needs specific steps:
- Place parchment paper circles at the bottom of three 9-inch round cake pans
- Apply non-stick baking spray or brush butter on the sides
- Light greasing of sides works best since heavy coating leads to uneven rising
- Dust the sides with flour as an extra precaution
- Remove excess flour with a gentle tap to avoid a gummy exterior
Baking Time and Temperature
Perfect cake layers depend on the right temperature during baking. Your oven should be at 350°F (177°C) before you start. The oven rack needs to be in the center to distribute heat evenly.
Here’s how to get evenly baked layers:
- Wrap water-soaked cake strips around the pans
- Give the pans a half-turn midway through baking if needed
- Keep the oven temperature steady
- Don’t open the oven door too often
Most cakes take 24-25 minutes to bake. The baking time can vary based on your pan type, how accurate your oven runs, and the humidity in your kitchen. You should start testing if the cake is done at the 22-minute mark.
Your cake is ready when:
- The middle bounces back after a light touch
- You’ll see the edges pulling away from the pan
- A toothpick comes out clean or with just a few crumbs
- The top looks golden brown
Cooling the Layers
The cake’s structure and stability depend on proper cooling. You need to follow two cooling phases that work together.
Original Cooling Phase:Let the cakes sit in their pans for exactly 10 minutes once they’re out of the oven. This short cooling time helps the structure set and keeps the sides from pulling away from the pan.
Final Cooling Phase:The layers need to come out of their pans after the original rest. Here’s how:
- Running a thin knife around the edges
- Placing a cooling rack upside down on top of the pan
- Flipping the pan and rack together in one smooth motion
- Gently lifting the pan away
- Removing the parchment paper
- Placing another rack on top and flipping right-side up
Room temperature cooling must be complete before you add frosting. This usually takes 2-3 hours based on room conditions. Don’t try to rush the cooling in the refrigerator because condensation can ruin your cake’s texture.
Your strawberry cake layers should feel completely cool before you start assembly and frosting. Many professional bakers wrap their cooled layers in plastic and leave them in the refrigerator overnight. This makes the cake easier to work with during assembly.
Making the Strawberry Frosting
Strawberry frosting adds the perfect finishing touch and serves as a significant structural component in this fresh strawberry cake recipe. This well-executed frosting enhances the cake’s visual appeal and seals in moisture while complementing its natural strawberry flavor.
Whipping the Butter
Perfect strawberry frosting starts with properly prepared butter. Your butter should be at 70-75°F to whip perfectly. Press it lightly with your finger – it should leave an impression without feeling greasy. Here’s how to whip it right:
- Whip the butter by itself at medium-high speed for 7 minutes
- Scrape the bowl’s sides and bottom really well
- Keep beating until the butter’s color lightens substantially
- Your mixing speed should stay steady
- You should stop if the butter gets too warm
Adding Powdered Sugar
Powdered sugar needs patience and precision to get the perfect texture. Mix confectioner’s sugar bit by bit at low speed. This careful process helps avoid a grainy texture that could spoil your frosting.
The frosting’s quality shows in these key signs:
- Soft peaks that stay in shape when formed
- A silky texture without any sugar granules
- The right firmness that works well with piping
- An even color from top to bottom
Adding Strawberry Flavor
Bakers can choose between two great ways to get real strawberry flavor in their frosting. The first way uses the cooled strawberry reduction from earlier in the recipe. The second uses freeze-dried strawberries that pack more concentrated flavor.
At the time you use fresh strawberry reduction:
- Add 3-4 tablespoons of cooled reduction
- Add it slowly to prevent curdling
- Watch the consistency closely
- Add more powdered sugar if needed
To use the freeze-dried strawberry method:
- Process strawberries into a fine powder
- Add powder slowly while mixing
- Add 2-3 tablespoons of heavy cream
- Mix until completely smooth
Your frosting should pass this simple test: press a rubber spatula into it and lift. You should see a somewhat stiff peak with a slight curl at the tip. The frosting needs more heavy cream (one teaspoon at a time) if it’s too stiff. Add more powdered sugar (quarter-cup at a time) if it’s too soft.
Important Note: Kitchen temperature can really affect your frosting’s consistency. Warm kitchens (above 75°F) might need a special fix – replace up to half the butter with high-ratio shortening. This swap helps keep your frosting stable during assembly and display.
The best results come from using this strawberry frosting right after you make it. You can store it in an airtight container at room temperature for up to two days or keep it in the fridge for up to a week. Just remember to bring chilled frosting back to room temperature and whip it again before use to get back its original texture.
Assembling and Decorating the Cake
Individual cake components come together to create a stunning layered masterpiece during the final assembly phase. This significant step demands precision and attention to detail. Professional results in this fresh strawberry cake recipe depend on your patience throughout the process.
Leveling the Layers
Perfect cake layers start with proper leveling techniques. Bakers need to use a long serrated knife or cake leveler while standing at eye level with the cake. The process works best with gentle sawing motions from the outer edges toward the middle. Each layer should be approximately 2 inches in height after leveling. This creates a stable foundation and makes the cake look amazing.
To get the best results:
- Mark the cake’s circumference before you start cutting
- Turn the cake as you cut to keep it even
- Hold your knife parallel to the counter
- Clean off loose crumbs with a pastry brush
- Keep the trimmed pieces to taste test quality
Frosting Between Layers
Layer assembly needs proper frosting application to ensure stability and prevent sliding. A small dollop of frosting goes in the center of the cake board as an anchor for the first layer. The original frosting “glue” stops the cake from changing during assembly.
These steps show you everything in the layering process:
- Place the first layer cut-side up on the prepared board
- Pipe a thick border of frosting around the edge to create a dam
- Fill the center with approximately 3/4 cup of strawberry frosting
- Smooth the filling with an offset spatula
- Position the second layer cut-side down
- Repeat the process for remaining layers
- Place the final layer cut-side down for a smoother top surface
Final Decorations
A simple strawberry cake recipe becomes an elegant dessert with the right finishing touches. Start by applying a crumb coat – a thin layer of frosting that seals in loose crumbs. The cake needs 30 minutes in the refrigerator at the time the original coat sets.
The final coating of strawberry frosting goes on after the crumb coat sets. You can achieve smooth sides by using a bench scraper or icing spatula at a 90-degree angle to the cake’s surface. You retain control of professional-looking results through consistent pressure as you smooth the frosting.
Clean, sharp edges form where the top meets the sides when you start from the center and work outward. This approach will give a slight overhang that blends into the sides. Many professional decorators chill the cake between frosting applications to keep its shape intact.
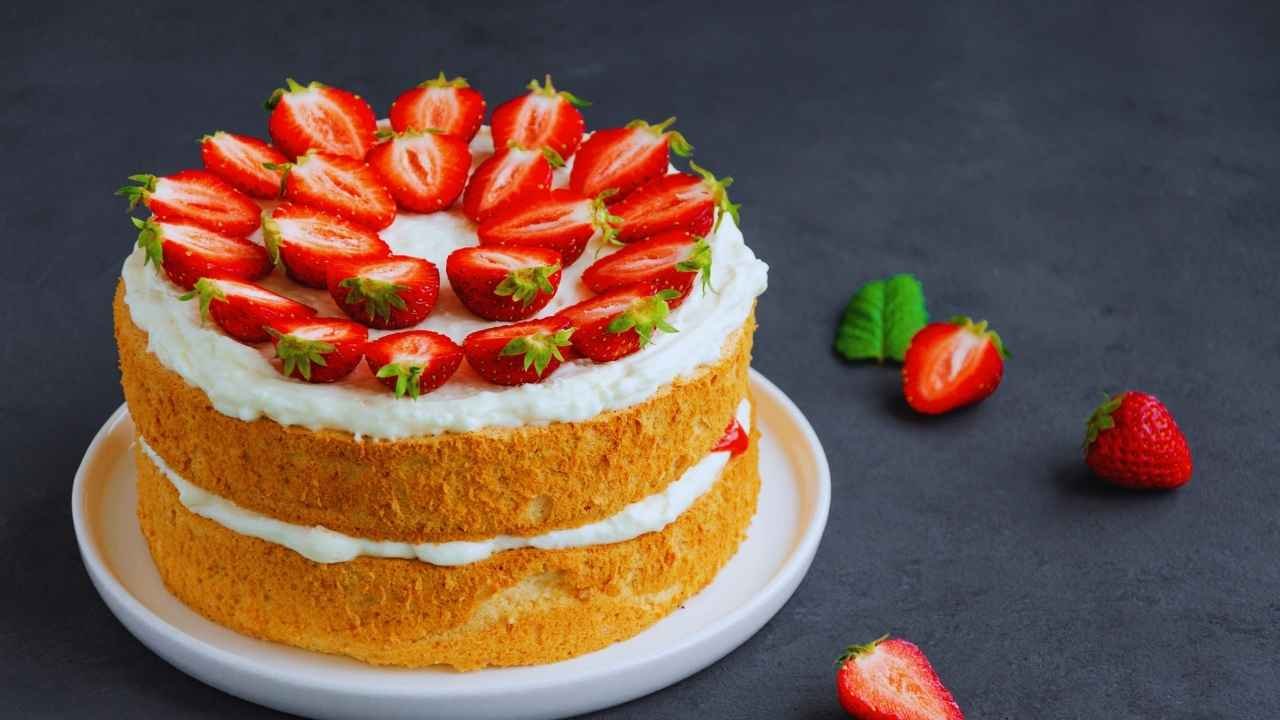
Your decorative elements should enhance the fresh strawberry cake recipe’s natural charm. Fresh strawberries arranged in a circular pattern create an elegant finishing touch. Here are some additional options:
- Piped rosettes using remaining frosting
- Fresh mint leaves for color contrast
- White chocolate shavings
- Edible flowers
- Strawberry dust made from freeze-dried berries
The right temperature is vital during decoration. Keep the cake cool but not cold, between 65-70°F. Frosting becomes too soft in warm environments, making clean lines and sharp edges difficult to achieve.
Special occasions might call for themed elements that preserve the cake’s elegant look. Textural variations come alive through different piping techniques, adding visual interest without overwhelming the design. Many professional bakers suggest simple decorations that let the strawberry components’ natural beauty stand out.
Let the completed cake rest in the refrigerator for at least 2 hours before serving. This time allows all elements to set and ensures clean, precise cuts. The cake tastes best when you take it out 30 minutes before serving to reach the ideal temperature.
Storage becomes significant after decoration. A covered container in the refrigerator keeps the finished cake fresh for up to three days. Natural moisture from fresh strawberry components helps prevent drying, though the texture might change if refrigerated longer than three days.
How to Make a Delicious Strawberry Cake Recipe from Scratch
Course: DessertCuisine: AmericanDifficulty: Easy12
servings40
minutes25
minutes400
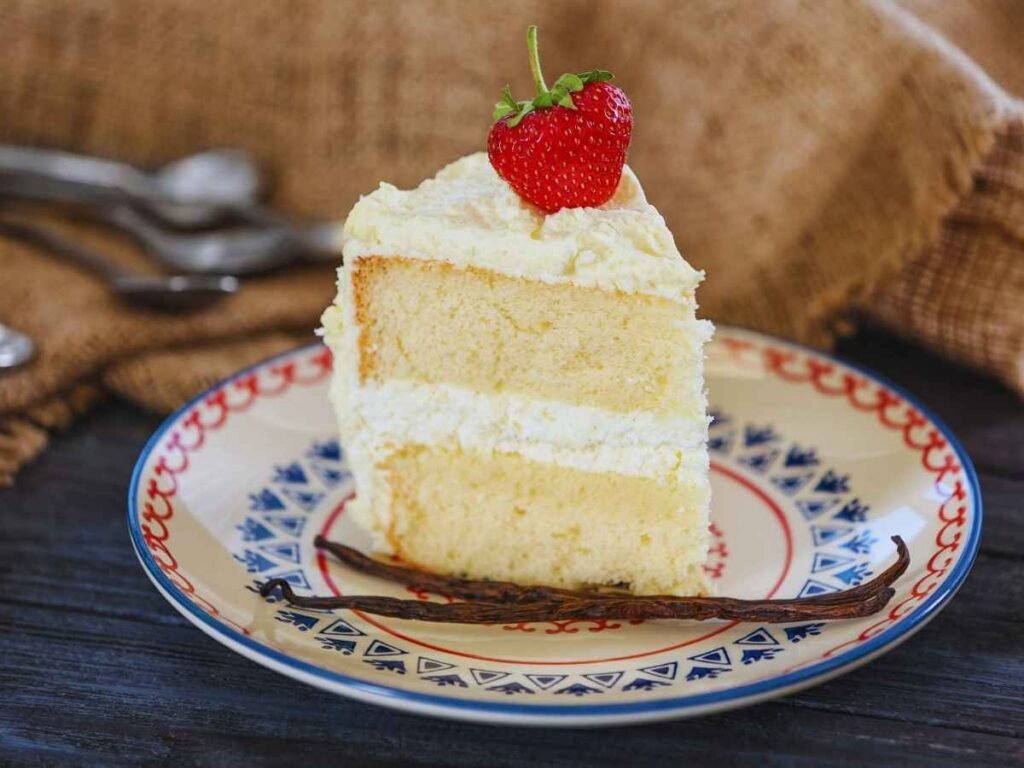
kcalThis homemade strawberry cake features a vibrant pink color and rich strawberry flavor, made with a strawberry reduction and paired with a smooth strawberry frosting. It’s perfect for any special occasion.
Ingredients
Dry Ingredients:
2½ cups all-purpose flour (320g), sifted
2½ tsp baking powder
½ tsp baking soda
¾ tsp salt
1¾ cups granulated sugar (350g)
Wet Ingredients:
1 cup unsalted butter (226g), softened
½ cup vegetable oil (120ml)
3 large eggs, room temperature
1 tsp vanilla extract
½ cup sour cream (120g)
½ cup buttermilk (120ml)
Strawberry Reduction:
16 oz fresh or frozen strawberries (453g)
½ cup granulated sugar (100g)
2 tbsp lemon juice
1 tbsp lemon zest
Pinch of salt
Directions
- Make Strawberry Reduction:
Cook strawberries, sugar, lemon juice, and zest until bubbling. Blend into a puree, strain, and reduce for 30-40 minutes until thickened. Cool completely. - Prepare Cake Batter:
Cream butter and sugar until light and fluffy. Add eggs one at a time, followed by vanilla and sour cream. Alternate adding dry ingredients and buttermilk, mixing gently. Fold in cooled strawberry reduction. - Bake:
Preheat oven to 350°F (177°C). Grease and line two 9-inch cake pans. Divide batter evenly. Bake for 24-25 minutes or until done. Cool in pans for 10 minutes, then on racks until completely cool. - Make Frosting:
Whip softened butter, add powdered sugar gradually. Mix in cooled strawberry reduction or freeze-dried strawberry powder. Adjust consistency with heavy cream if needed. - Assemble Cake:
Level cake layers, frost with a crumb coat, refrigerate for 30 minutes, then apply final frosting. Decorate with fresh strawberries or your choice of toppings. - Serve:
Chill cake for 2 hours before slicing, then serve at room temperature.
Recipe Video
Notes
- Ensure all ingredients are at room temperature.
Cool the strawberry reduction before adding it to the batter.
Let the cake layers cool completely before frosting.
Conclusion
This strawberry cake recipe just needs careful attention to detail. Quality ingredients and precise techniques make all the difference. The baker’s success depends on a perfect strawberry reduction, the right temperature control and a step-by-step assembly process. The result tastes better than anything from a store. These steps help build skills that work well with other recipes too.
Anyone can create bakery-quality cakes at home by following these steps carefully. The cake’s natural pink color, real strawberry flavor and perfect texture show why scratch baking works best. This recipe is evidence of what happens when quality ingredients meet proper technique. Your family and friends will enjoy this memorable dessert for years ahead.
FAQs
What ingredients are needed to make a strawberry cake?
To prepare a strawberry cake, you will need the following ingredients: 2 cups of white sugar, 1 cup of softened butter, one 3-ounce package of strawberry flavored Jell-O®, 4 large eggs at room temperature, 2 ¾ cups of sifted cake flour, 2 ½ teaspoons of baking powder, 1 cup of whole milk at room temperature, and ½ cup of strawberry puree made from frozen sweetened strawberries.
What is the key to making a delicious cake?
The secret to a delicious cake lies in using high-quality ingredients like fresh eggs, real vanilla extract, and top-grade flour. Ensure all ingredients are at room temperature before mixing. Employing the creaming method to aerate the batter can also help achieve a lighter, more desirable texture.
How can I enhance the flavor of my cake?
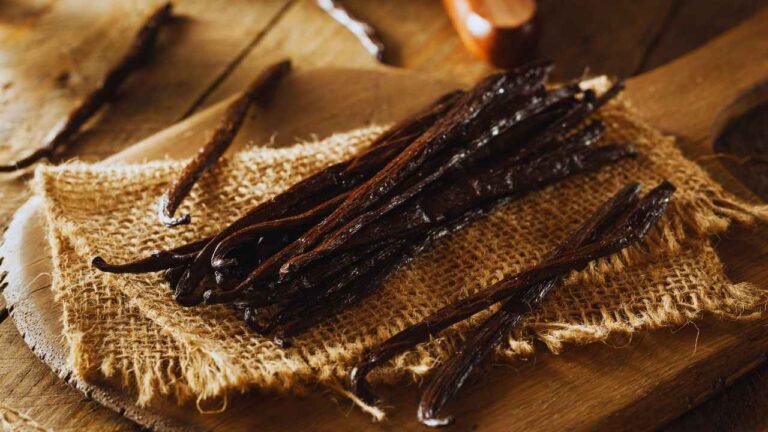
Enhancing your cake’s flavor can be achieved by adding pure extracts such as vanilla, almond, lemon, or orange. Fresh citrus zest or using premium ingredients like vanilla bean paste or fresh vanilla beans can significantly enrich the flavor, especially in simpler boxed mixes.
What techniques help make a cake moist and fluffy?
For a moist and fluffy cake, use cake flour and avoid overmixing the batter. It’s crucial to maintain the correct baking temperature and to avoid overbaking. Adding moisture between the cake layers, soaking the cake lightly, frosting it immediately after baking, and storing it properly are all effective strategies to ensure your cake remains moist and airy.