How to Make Mushroom Wellington: A Foolproof Recipe for Perfect Results
Need a stress free way to feed a small crowd with the best mushroom wellington recipe that serves 8-10? This showstopping vegan centerpiece could be just what you’re looking for for your next gathering.
Not only can you make this dish in advance and serve it to oohing and aahing guests, but it turns two pounds of mixed mushrooms into a savory masterpiece in an hour and 20 minutes. Whether you opt for cremini, king oyster, shiitake or wild mushrooms, this wellington will yield restaurant-quality results from the comfort of your own home.
In fact, the filling can be made a day in advance of your event, making it a great dessert for the upcoming holiday festivities such as Thanksgiving and Christmas. Hey, want to learn how to make this foolproof mushroom wellington? So now, let’s go step by step to guarantee your success!
Essential Ingredients for the Perfect Mushroom Wellington
The key to a great mushroom wellington is to use higher quality ingredients that play well together. Knowing the role of each component helps you to develop that lovely, flaky crust with a rich and delicious filling.
Choosing the Right Mushroom Varieties
The secret to a strong mushroom wellington is to mix the sorts of mushrooms you use. In particular, you will want to employ:
- Cremini or chestnut mushrooms for their earthy base notes
- Shiitake mushrooms to add rich, umami depth
- Portobello or oyster mushrooms for meaty texture
Best Pastry Options and Alternatives
For the best balance of flakiness and flavor, make it with all-butter puff pastry, which should be your first and only choice. In addition, the pastry should be cool but not rigid when working with it.
If you need alternatives, which you should:
- Phyllo dough – creates an excellent moisture barrier, though less puffy
- Gluten-free pastry – made with almond, rice, or tapioca flour
Key Seasonings and Flavor Enhancers
To boost the flavor profile of your mushroom wellington, add these key components:
Category Key Ingredients Fresh Herbs Rosemary, thyme, sage Aromatics Garlic, onions, shallots Umami Boosters Soy sauce, miso paste Additional Enhancers Balsamic vinegar, truffle oil (optional) Especially important is combining tomato paste with miso paste, the combination of which adds depth due to their high glutamate content. You can also add nutty texture to your filling by stirring in toasted pecans or walnuts.
For best results, be sure that your puff pastry is properly thawed — it should be cold but workable. Also, when using mushrooms, wipe them clean with a damp cloth (do not submerge ur or wash them as excess moisture can affect the final texture).
Preparing Your Mushroom Filling
It’s how you prepare your mushroom filling that’s the difference between a soggy wellington and a perfectly crisp one. The first thing is that the way you clean and chop really influences final texture.
Proper Mushroom Cleaning and Chopping Techniques
Fresh mushrooms: For cultivated mushrooms, wash them with a damp cloth to remove dirt. Next, chop your mushrooms in different size pieces to provide an interesting texture. Now at this point you may place in foodprocessor and puls the mushrooms for a finer consistency (About 10-15xs)
Achieving the Ideal Texture and Moisture Level
Crucial to understand, moisture is the biggest risk to wellington success. Here’s how to get that perfect consistency:
- Cook mushrooms until the pan is completely dry (approximately 10 minutes)
- Sauté in batches to ensure even cooking
- Blot cooked mushrooms with paper towels for extra moisture removal
For optimal results, follow these timing guidelines:
Step Duration Visual Cue Initial Sauté 3-4 minutes Mushrooms begin to color Moisture Reduction 10 minutes Pan becomes dry Final Cooking 4 minutes Mixture starts sticking to pan Adding Complementary Ingredients
After achieving the right texture, enhance your filling with these flavor-building ingredients:
- Soy sauce (adds depth without extra salt)
- Fresh herbs (sage, rosemary, or thyme)
- Chestnuts (for texture contrast)
- Spinach (ensure it’s well-drained)

So be sure to let your filling cool completely before assembly. This resting stage is key in preventing moisture from spoiling your pastry’s structure. For best results, you can make the filling a day in advance, which gives it time to deepen in flavor and ensures that it will be the right temperature when it’s time to assemble.
Don’t forget to squeeze excess moisture from other add-ins, such as spinach. This additional step makes sure your wellington keeps its structural integrity during the cooking process.
Mastering the Pastry Assembly
The assembly step of your mushroom wellington will require care and focus. So first, let’s create a structure that is beautiful and serves its purpose.
Rolling and Shaping Techniques
First, lay your puff pastry on a lightly floured surface. Roll it out to a 1/8-inch to 1/4-inch thickness. Most important, keep the pastry cold as you work — if it feels warm to the touch, put it back in the refrigerator.
For the best results, follow these temperature recommendations:
Stage Temperature State Initial Rolling Cool but pliable Before Filling Chilled Final Assembly Cool to touch Creating a Tight Seal
Correct sealing will ensure your wellington keeps its form while baking. Here’s the essential process:
- Brush the pastry edges with egg wash
- Lift one side over the filling, stretching gently if needed
- Press the seams together firmly, ensuring no air pockets remain
- Crimp the edges with a fork to create a tight seal
Decorative Scoring Patterns
When combined with good sealing, decorative scoring adds both beauty and function to your wellington. Here are a few classic patterns to consider:
- Cross-hatch design: Make parallel cuts, then cross them diagonally
- Simple vents: Create three small horizontal slits
- Lattice top: Use a specialized cutter for intricate patterns
So, as a rule of thumb, when making decorative patterns, only pierce the surface layer — unless you are making venting slits. To achieve that golden crust, brush the entire surface with egg wash before baking.
Baking Your Mushroom Wellington
To bake your mushroom wellington to success, you need on-point temperature control and timing. Here is what you need to do to reach that ideal crisp, flaky crust.
Temperature and Timing Guidelines
The optimal baking temperature depends on what you want to achieve. For best results, start with a two-temperature formula that we know works:
Baking Stage Temperature Time Initial Bake 375°F (190°C) 25-30 minutes Final Crisp 425°F (218°C) 10-15 minutes For best results, put your wellington on the middle rack of a preheated oven. As a result, this positioning provides for even heat distribution during baking.
Visual Cues for Doneness
And in the meantime, be on the lookout for these signs that your wellington is perfectly baked:
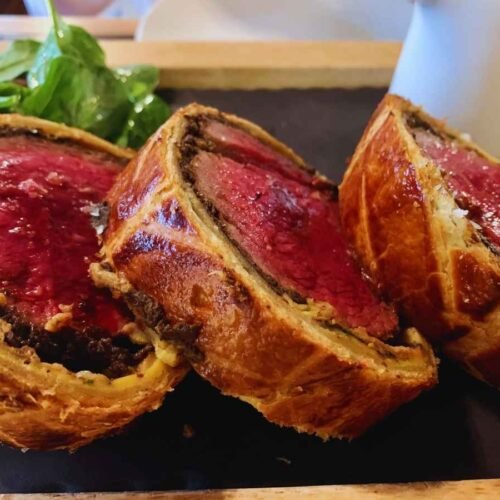
- Deep golden color across the entire surface
- Flaky, puffed-up pastry layers
- Crisp, dry bottom crust
And, like the brisket, you can also see if it’s done internally as well, with an internal temperature of 200-205°F (94-96°C). So using a meat thermometer helps ensure your results are perfect every single time.
Resting and Serving Tips
Once baked, let your mushroom wellington rest for 10-15 minutes. Over this resting period, that internal temperature keeps on evening out, allowing for cleaner slices.
For serving, use these professional techniques:
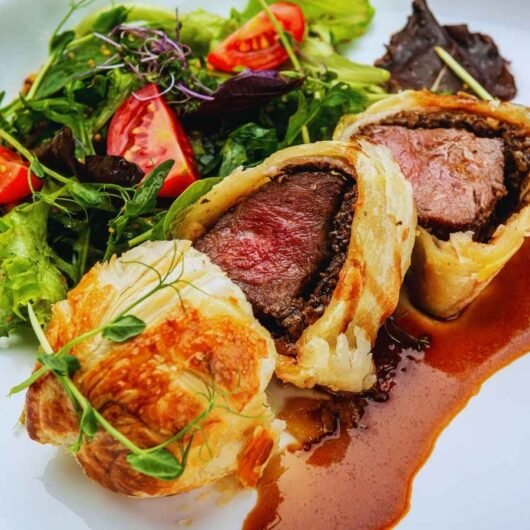
- Cut crosswise into 8 even slabs
- Present each slice with the cross-section facing up
- Serve immediately while still warm
Storing and Reheating Guidelines:
- Refrigerate leftovers for up to 4 days
- Reheat at 375°F (190°C) for 15 minutes
- Alternatively, use an air fryer for 5 minutes to restore crispiness
Making ahead? You can make the filling up to 2 days ahead. This flexibility in preparation ultimately makes your mushroom wellington ideal for holiday entertaining or special occasions.
Troubleshooting Common Issues
Even experienced cooks struggle with their mushroom wellington once in a while. However, you are dealing with a – basically – three common issues with obvious solutions.
Preventing Soggy Bottoms
You need moisture management to create the A+ portobello wellington. It’s excess liquid that’s the first cause of making a soggy pastry. Here’s a full moisture management strategy for you:
- Cook mushroom filling until completely dry
- Blot cooked mushrooms with paper towels
- Cool filling thoroughly before assembly
- Consider using breadcrumbs as a moisture barrier
Then make sure your mushroom mixture looks dry and that no liquid sloshes around in your bowl before you put any of it together. In general, cooking until all wine has evaporated produces the best consistency.
Fixing Tears and Leaks
Pastry tears can happen during assembly, so knowing how to repair them is key. Depending on the type of tear, consider these solutions:
Tear TypeSolutionTemperatureNoteUnfolding TearsWait for slight softeningRoom temp, 10 minutesAssembly TearsPatch with extra pastryKeep pastry coolEdge TearsSeal with egg washWork quicklyFor best results, let your pastry come to a workable-but-not-too-soft texture. Or warm it gently at the lowest oven temperature if too stiff.
Addressing Uneven Cooking
For even cooking all the way through your wellington you’ll need to consider a few things:
Temperature Management:
- Chill assembled wellington for 1 hour before baking
- Use a 375°F oven for even cooking
- Allow 10-minute rest before slicing
Storage and Reheating:
- Store in airtight container up to 2-3 days
- Reheat at 360°F for 20 minutes
- Tent with foil to maintain warmth
Take care to score the top of your wellington for even cooking. This method leaves gaps for steam to escape, ultimately preventing internal pressure from building up to the point where it can result in uneven cooking or bursting.
For make-ahead ease, make fillings ahead and heat up until you’re ready to assemble. This method not only guarantees even cooking but full flavor development as well.
Conclusion
Perfecting mushroom wellington puts a showstopping vegan main course within your grasp. With controlled ingredient choices, correct moisture management and accurate assembly methods, you can safely prepare this showstopping dish at home.
There are many mushrooms to choose from, ensuring that you have excellent variety during the growing process, and moisture can be expertly controlled for a production with plenty of delicious shroom goodness. It’s these steps, with the added patience of letting the filling cool completely and the baked wellington rest, that ultimately pay dividends for you.
And best of all, this adaptable recipe works around your schedule. Make elements in advance for low-stress fun, or do it all in a single effort when you have a few moments to spare. Equipped with the know-how to troubleshoot and make ahead, you now have all the tools you need to serve this elegant dish that’s sure to impress.

How to Make Mushroom Wellington: A Foolproof Recipe for Perfect Results
Course: DinnerCuisine: Vegan / British-InspiredDifficulty: Easy10
servings40
minutes45
minutes320
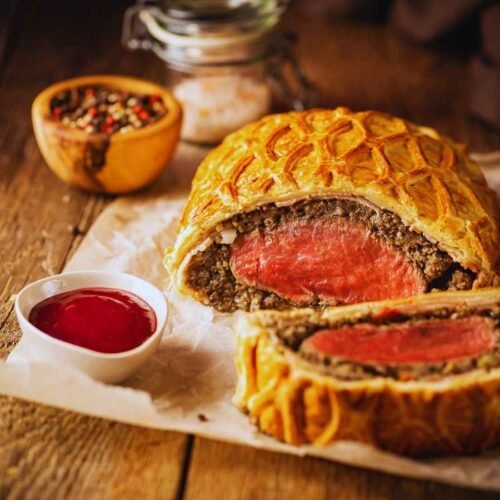
kcalThis Mushroom Wellington is a stunning vegan main dish that’s great for holidays and can be the vegetarian star at any special meal. Featuring a mix of mushrooms and fresh herbs, all enfolded in flaky puff pastry, it’s an impressive savory centerpiece for 8–10 people, which can be made in advance!
Ingredients
2 lbs mixed mushrooms (cremini, shiitake, oyster, etc.)
1 onion or 2 shallots, finely chopped
3–4 garlic cloves, minced
2 tbsp soy sauce
1 tbsp tomato paste
1 tbsp miso paste
1 tbsp balsamic vinegar
1 tbsp olive oil or vegan butter
1 sheet puff pastry (or GF alternative)
1 tsp each rosemary & thyme
Optional: ½ cup toasted walnuts, 1 cup cooked spinach
Plant-based egg wash
Directions
- Sauté mushrooms: Clean and chop mushrooms. Cook in batches until fully dry.
- Flavor: Add onion, garlic, soy sauce, miso, tomato paste, balsamic vinegar, and herbs. Mix well. Let cool.
- Assemble: Roll out pastry. Add cooled filling. Fold, seal, and decorate. Chill for 30–60 minutes.
- Bake: Preheat to 375°F (190°C), bake 30 min. Raise to 425°F (218°C), bake 10–15 more min until golden.
- Serve: Rest 10–15 min before slicing. Serve warm.
Recipe Video
Notes
- And but to prevent a Soggy Bottom make the mushroom filling full dry and is cooled before you assembled. The secret to excellent flakiness is to use dough that is very cold when it goes into the oven.
FAQs
How do I keep my mushroom wellington from getting soggy?
To avoid sogginess, cook the mushroom filling until very dry; blot it with paper towels and let it cool completely before assembly. Breadcrumbs can be used as a moisture barrier as well. Keep your mushroom mixture dried out and not showing liquid before you wrap it in a pastry.
How can you ensure you have the right texture in a mushroom wellington?
Moisture control is the top priority. Sear mushrooms until they’re totally dry in the pan (about 10 minutes), sauté in batches so they cook evenly, and blot cooked mushrooms with paper towels. Cool the filling completely before assembly to avoid any moisture compromising the integrity of the pastry.
Which mushrooms are best for a wellington?
A variety of types of mushrooms is best. Go cremini or chestnut mushrooms for earthy base notes, shiitake for rich umami depth, portobello or oyster mushrooms for meaty texture. This combination results in a hearty and tasty filling.
How long do I cook a mushroom wellington?
Use two temperatures for the best results. Forty-five to 55 minutes total — first at 375 to be sure it’s cooked through, then raise the heat to 425 for 10 to 15 minutes for a crispy finish. As always, look for a deep golden hue and an internal temperature of 200-205°F (94-96°C).
Can I make mushroom wellington ahead of time?
Yes, you can make the mushroom filling up to 2 days in advance and store it in the fridge. It helps save time but also allows the flavors to mingle. To bake, assemble the wellington with the cooled filling and raw pastry. This make ahead option is perfect for no-stress entertaining.