How to Make the Perfect Chicken Brine Recipe at Home
A significant step separates ordinary chicken from exceptional results: brining. Top chefs know a proper chicken brine recipe helps them create juicy, flavorful dishes that lift their cooking above the ordinary. Salt, water, and aromatics work together through this simple scientific process and reshape everyday poultry into restaurant-quality meals.
Making chicken brine at home lets you cook perfect poultry consistently. You’ll find the best techniques in this piece, from exact salt-to-water ratios to optimal brining times and preparation steps. The science behind brining makes sense when you understand it, and professional tips will help you achieve exceptional results in your kitchen.
What is Chicken Brining?
Brining involves soaking meat in a salt-water solution before cooking. This proven technique revolutionizes ordinary poultry and creates tender, flavorful dishes. The process combines salt, water, and optional aromatics to enhance the meat’s natural taste.
Benefits of Brining
A well-executed chicken brine recipe brings three key improvements to poultry:
• Better moisture retention that keeps meat juicier after cooking
• Softer texture from protein changes that create more tender chicken
• Rich, even seasoning that reaches deep into the bone
Brining protects chicken from overcooking and gives cooks more room to work with. The technique works best with lean cuts that would normally dry out quickly on the heat.
How Brining Works
The science behind brining shows a fascinating mix of chemical reactions. Chicken submerged in brine solution triggers two main mechanisms that work together.
The osmosis process kicks in as salt breaks down into positively charged sodium ions and negatively charged chloride ions. These ions create conditions that let meat’s muscle fibers absorb and hold more moisture. Salt solutions can make muscle fibers swell to more than double their size.
The protein modification happens next. Salt breaks down muscle proteins partially (or denatures them). This creates tiny spaces inside the meat that trap moisture and keep it from escaping during cooking. The best results come from salt concentrations between 4-6% of the solution.
This change takes time. The meat can get up to 10% heavier from soaking up moisture. The extra moisture and changed protein structure help keep the chicken juicy even at high cooking temperatures.
Temperature is a vital part of brining. Cold brine solutions work better than warm ones and produce tender, juicier chicken after cooking. The time needed depends on the meat’s size. A good rule is to brine for about one hour per pound.
Garlic, herbs, and peppercorns can boost your chicken brine’s flavor. Note that while these extras add to the taste, salt does the real work in transforming the meat.
Ingredients for the Perfect Chicken Brine
A perfect chicken brine recipe begins with the right ingredients and their exact measurements. The basic process is straightforward and attention to detail leads to restaurant-quality results.
Salt and Water Ratio
The life-blood of a successful chicken brine depends on the precise balance between salt and water. These standard ratios will give you optimal results:
Brining Duration Salt Amount (per gallon of water) 4-5 hours 1 cup Morton Coarse Kosher Salt 8-14 hours ½ cup Morton Coarse Kosher Salt Important: Your salt choice will affect the measurements by a lot. Different salt varieties need quantity adjustments:
- Diamond Crystal Kosher Salt: Use the measurements as listed
- Morton Kosher Salt: Reduce by 25%
- Table Salt: Reduce by 50%
A simple brine solution that covers about four chicken breasts needs 4 cups of cold water combined with any of these:
- 6 tablespoons Diamond Crystal kosher salt
- 4½ tablespoons Morton’s kosher salt
- 3 tablespoons fine or table salt
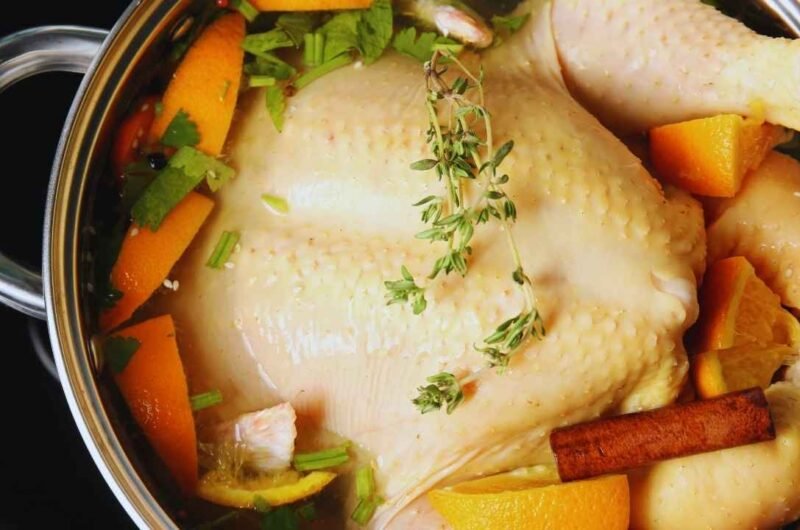
Optional Flavorings
Salt and water are the foundations of any brine, but you can lift a simple chicken brine recipe with extra ingredients. These recommended additions will boost your brine’s flavor:
• Aromatics and Herbs:
- Fresh rosemary, thyme, and sage (½ cup each)
- Bay leaves (2-3 leaves)
- Fresh parsley
- Crushed garlic cloves (4-6)
- Whole peppercorns (1 tablespoon)
• Sweeteners and Citrus:
- Honey or brown sugar (½ cup)
- Lemon or orange quarters
- Fresh citrus zest
Your flavor profile can include these extras based on your priorities:
- Warm Spices: Whole cloves, cinnamon sticks, or star anise
- Heat Elements: Dried chiles or crushed red pepper flakes
- Savory Additions: Minced onions or garlic granules
The simple salt-to-water ratio should remain your foundation while using these optional ingredients. These flavors should complement the brining process’s main goal. A tablespoon of garlic granules works well as a starting point for extra flavoring in a standard 60-minute brine.
Food safety is vital, so use cold water and keep your brining chicken refrigerated. You can scale the recipe up or down by maintaining the salt-to-water ratio and adjusting other ingredients to taste.
Step-by-Step Brining Process
The proper technique is significant to achieve perfectly brined chicken. A step-by-step process will give optimal results and keeps food safety standards high during preparation.
Preparing the Brine Solution
A perfect chicken brine depends on how well you dissolve the salt. Here’s everything in making it right:
- Pour cold tap water into a non-reactive container
- Mix in your recipe’s measured salt
- Keep stirring until you see the solution turn clear
- Look for salt crystals at the bottom to make sure everything dissolves
- Throw in your favorite aromatics if you want
Pro tip: Skip metal containers because they react with salt. Glass, plastic, or food-grade storage containers work best.
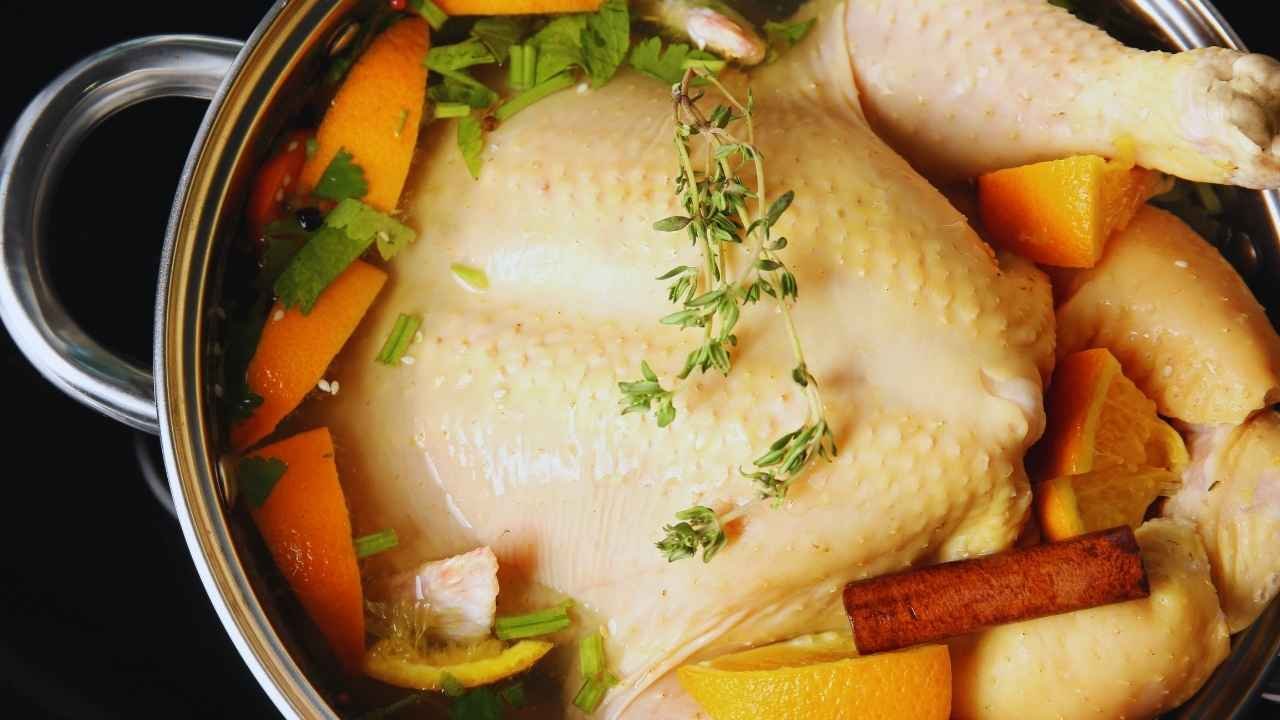
Submerging the Chicken
Even brining needs proper submersion. Here’s what you need to do:
- Pick a container that covers the chicken completely
- The chicken might float, so put a plate or weight on top to keep it down
- Smaller pieces work best in resealable plastic bags to get full coverage
- Push out air pockets between the chicken and brine solution
Multiple chicken pieces need space to let the brine flow around them. Your chicken should move freely in the solution.
Brining Time
The brining duration affects the final result by a lot. Here’s a complete timing guide:
Brining Duration Results Best Used For 15-30 minutes Light seasoning, minimal texture change Quick preparation 30-60 minutes Perfect seasoning, noticeable tenderness Most chicken cuts 2 hours Stronger salt flavor, very tender Larger pieces 4-6 hours Intense flavor, significant texture change Whole chickens Important Safety Notes:
- Room temperature works fine for brining times under 30 minutes
- You must refrigerate anything that brines longer than 30 minutes
- The brine temperature should stay below 40°F (4°C) in the refrigerator
- Your brining time should not exceed 8 hours because this leads to overly salty and spongy meat
Most chicken cuts need only 30-60 minutes of brining. This timeframe gives you the perfect balance of flavor and texture improvement without making the meat too salty. Your chicken’s flavor will taste even better if you add 1 tablespoon of garlic granules during a 60-minute brine.
Larger cuts or whole chickens need more time to brine properly in the refrigerator. The cut’s thickness and size matter more than its total weight for determining the right brining time.
Cooking Your Brined Chicken
The brining process requires significant preparation and cooking techniques to achieve the best results. These final steps determine whether your brined chicken turns out good or exceptional.
Rinsing and Drying
Many people rinse brined chicken, but this practice spreads bacteria in your kitchen. The correct preparation method involves these simple steps:
- Remove the chicken from the brine solution
- Pat really dry with paper towels
- Place on a wire rack if you plan to cook later
- Let it reach room temperature (approximately 1 hour)
Pro Tip: Your chicken’s skin will turn extra-crispy if you leave it uncovered in the refrigerator up to 24 hours before cooking. This technique creates a dry environment that helps achieve better browning and crisping during cooking.
Roasting Tips
A perfectly roasted brined chicken depends on proper temperature control and timing. Here’s a proven temperature progression to follow:
Cooking Stage Temperature Duration Initial Roasting 425°F 15 minutes Main Cooking 350°F 20-25 minutes Final Internal Temp 165°F Rest 10 minutes Essential Roasting Guidelines:
- Your oven needs preheating to cook the chicken evenly
- The brine has seasoned the meat, so skip the extra salt
- A brush of olive oil or melted butter will boost browning
- The thickest part of the thigh needs temperature checking
- Let the chicken rest under loose foil
Storage Options: You don’t need to cook brined chicken right away. Here are your options:
- Keep it covered in the refrigerator up to 3 days
- Wrap it well and freeze up to 2 months
- Air-dry it in the refrigerator 12-24 hours before cooking
The best results come from placing the chicken breast-side up in a roasting pan. Pull it from the oven once it hits 155°F – it will keep cooking during rest time until it reaches a safe 165°F.
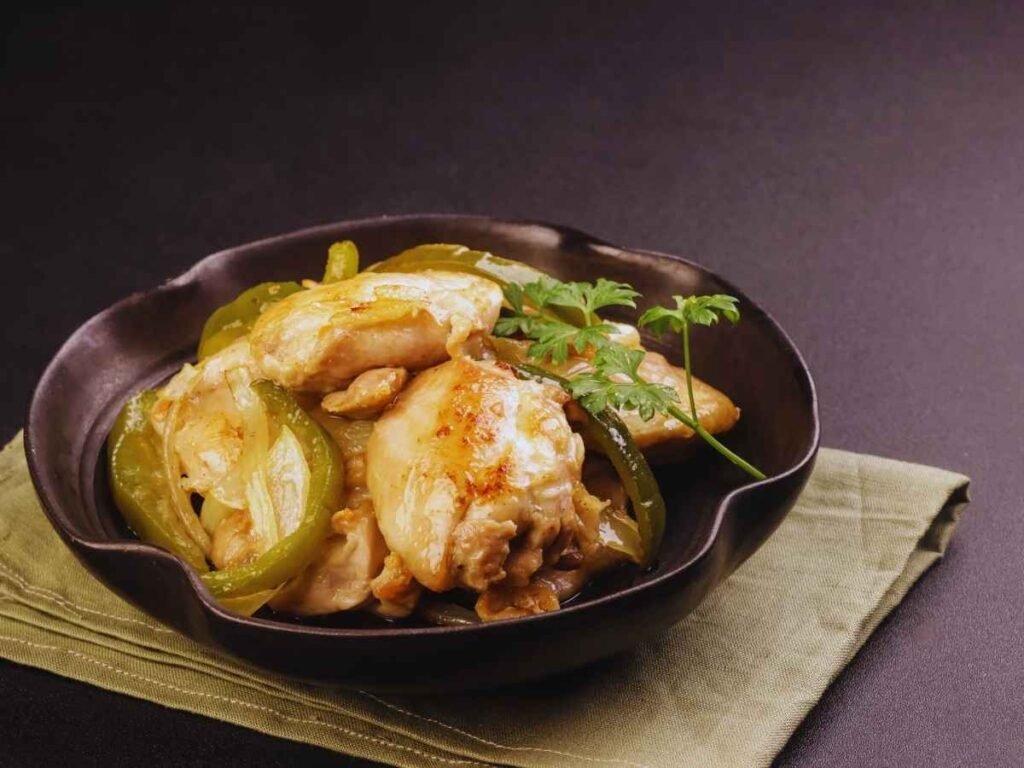
Alternative Cooking Methods:Brined chicken shines beyond roasting. The meat works great with:
- Grilling: High-heat cooking brings out the best
- Cast-iron skilling: You’ll get amazingly crispy skin
- Sheet pan roasting: One pan does it all
These methods cook brined chicken faster than regular chicken because of its higher moisture content. Watch that internal temperature closely to avoid overcooking.
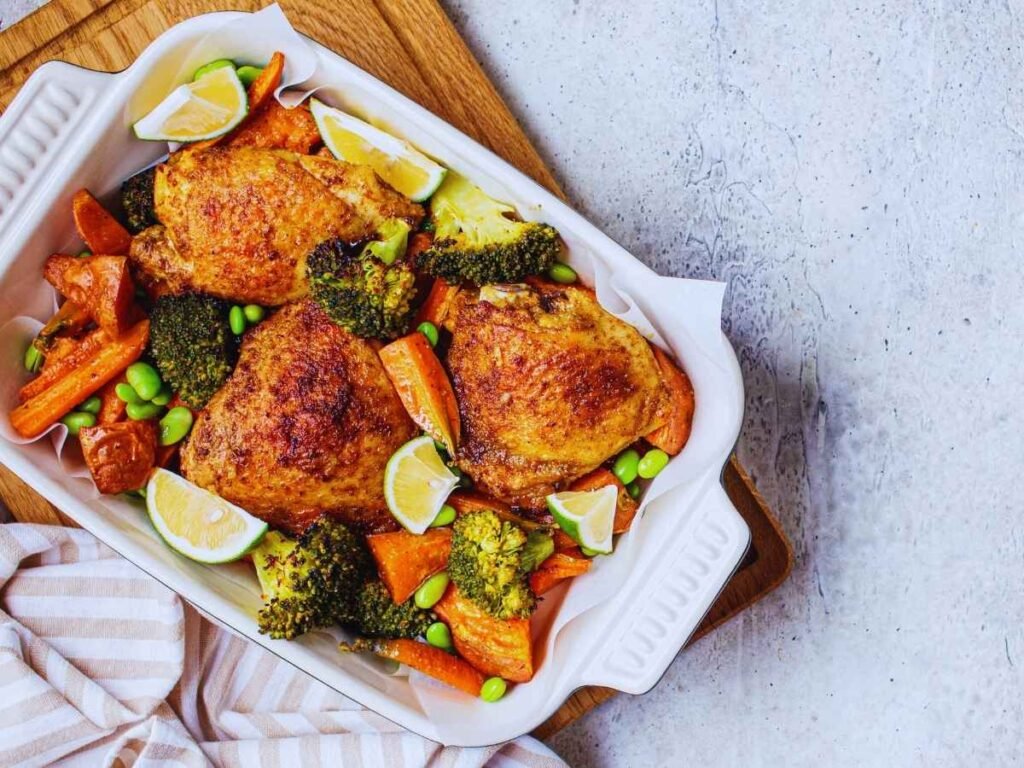
Chef’s Note: Root vegetables like onions, carrots, and turnips in your roasting pan will give you the best pan drippings. They soak up extra salt from the drippings and blend perfectly with unsalted broth to make balanced gravy without thickeners.
Baste your chicken every 15-20 minutes until it turns a rich, golden color. This extra care creates even browning and keeps the meat moist throughout cooking. Your finished chicken should have crispy skin all over and release clear juices when pierced.
Note that brined chicken makes saltier drippings than usual. You should taste them before making gravy or sauce, and adjust the seasonings so. If you plan to make gravy, think over using low-sodium broth to balance your pan drippings’ saltiness.
How to Make the Perfect Chicken Brine Recipe at Home
Course: SidesCuisine: AmericanDifficulty: Easy6
servings10
minutes45
minutes350
kcalThis simple and effective chicken brine recipe uses a perfect balance of salt, water, and optional aromatics to enhance the flavor and juiciness of your chicken. The brining process helps create tender, flavorful chicken with a deeper seasoning, whether you’re roasting, grilling, or pan-searing.
Ingredients
1 gallon cold water
1 cup Morton Coarse Kosher Salt (for 4-5 hours brine)
or ½ cup Morton Coarse Kosher Salt (for 8-14 hours brine)
Optional flavorings:
Fresh rosemary, thyme, sage (½ cup each)
2-3 bay leaves
4-6 garlic cloves (crushed)
1 tbsp whole peppercorns
½ cup honey or brown sugar
Lemon/orange quarters, fresh zest
Directions
- In a large non-reactive container, dissolve salt in cold water, stirring until clear.
- Add optional flavorings (herbs, garlic, citrus, spices) to the brine.
- Submerge chicken in brine, ensuring it’s fully covered.
- Brine for 15-30 minutes for light seasoning, 30-60 minutes for most cuts, 2-4 hours for larger pieces, or 4-6 hours for whole chicken.
- Remove chicken, rinse (optional), and pat dry with paper towels.
- Roast or cook chicken as desired.
Recipe Video
Tips:
- For crispy skin, leave the chicken uncovered in the fridge for up to 24 hours before cooking.
Use vegetables like onions and carrots in the roasting pan for added flavor.
Conclusion
Becoming skilled at chicken brining opens up amazing culinary possibilities. This technique turns regular poultry into exceptional dishes every time. The process is simple but needs precise salt ratios, timing, and temperature control to work. Home cooks can achieve professional results once they understand these basic brining principles. The key steps include proper solution preparation and final cooking methods.
Your brined chicken will turn out great if you pay attention to details. The process matters from the original preparation to the final rest period. With the right techniques and timing, you can make chicken that’s just as good as any restaurant. Each time you brine, you’ll get better at it and can try new flavor combinations. The science behind brining stays the same, but your results will keep improving.
FAQs
What is the recommended recipe for brining chicken?
For brining bone-in chicken pieces weighing about 4 pounds, combine 2 quarts of cold water with ½ cup of table salt and let the chicken brine for 30 minutes to 1 hour. For boneless, skinless chicken breasts (up to 6), mix 1½ quarts of cold water with 3 tablespoons of table salt and brine for the same duration. It’s important not to exceed the recommended brining time to avoid overly salty meat.
What is the ideal salt-to-water ratio for a brine solution?
The general rule for a basic brine solution is to add 1 tablespoon of salt for every cup of water. For larger quantities, such as 1 gallon of water, you would use 16 tablespoons (or 1 cup) of salt. Ensure the salt is fully dissolved in the water before adding the meat, then refrigerate the brining meat.
Which brining technique is considered the best?
Dry-brining is often preferred for seasoning meat, including poultry and sometimes seafood. This method not only enhances the juiciness and flavor of the meat but also promotes better Maillard browning and crispier skin.
How long is it safe to keep chicken in a brine?
After preparing and cooling the brine, submerge the chicken completely. You can either leave the chicken whole or cut it into pieces. Cover the container with plastic wrap and refrigerate. The chicken can safely brine for a minimum of 12 hours and up to 2 days.